Hello, guys, if you have bought the newly launched Realme Narzo 30 Pro smartphone and want to Root Realme Narzo 30 Pro with the help of Magisk, then this guide is for you.
In this guide, we have shared the easy way to root this phone. With the help of this guide, you will be able to Root Realme Narzo 30a & 30 Pro without any difficulty.
As we know that Realme has newly launched the Realme Narzo 30a and Narzo 30 pro, and users who bought this smartphones are now trying to find a safe way to root Realme Narzo 30 Pro on the Google search engine.
Specifications: Realme Narzo 30 Pro
Realme has launched two new smartphones named Narzo 30a, Narzo 30 Pro, Now these phones have been released in the Indian market, so lets talk about the specifications.
The Realme Narzo 30 Pro features a 6.5-inch FHD+ IPS LCD display with a 90Hz ultra smooth refresh rate, as well as the display’s resolution 1080 x 2400 and Corning Gorilla Glass 3 display protection.
Realme Narzo 30 Pro it’s powered by a MediaTek Dimensity 800U 5G (7 nm) Octa-core chipset and comes with a Mali-G57 MC3 GPU, which is a better combination for performance.
Talking about the camera, Realme Narzo 30 Pro comes with a triple-camera setup, which has a 48-megapixel primary camera on the rear, then another 8-megapixel ultra-wide camera, and then third 2-megapixel macro camera.
Realme Narzo 30 Pro is available in two RAM variants, the first with 6GB RAM + 64GB storage, and the second with 8GB RAM or 128GB internal storage.
Realme Narzo 30 Pro runs on Realme UI 2.0 based on Android 10, and talking about the battery, Narzo 30 pro has a 5000 mAh battery and it supports Super Dart 30W fast charging, which is going to give you a lot of battery life.
Before proceeding to this guide, it is important to know What are the advantages and disadvantages of rooting any Android device? Here is a advantages and disadvantages of rooting Realme Narzo 30 Pro.
Pros of Rooting Realme Narzo 30 Pro?
- You can Customize your phone according to your requirements.
- Easily Flash Custom Rom.
- Full control over the smartphone.
- Allows unsupported applications and games to be installed.
Cons of Rooting Realme Narzo 30 Pro?
- You will lose your Phone Warranty.
- If you apply any wrong steps can brick your phone.
- Your phone will no longer be secure.
Steps to Root Realme Narzo 30 Pro
In this guide, we have told you everything you need to Root Realme Narzo 30 Pro, you do not have to follow various articles to unlock the bootloader and install TWRP recovery, just follow the steps mentioned carefully and read this article till the end to root your device very easily .
Step 1: Unlock Bootloader on Realme Narzo 30 Pro
Step 2: Install TWRP Recovery on Realme Narzo 30 Pro
Step 3: Root Realme Narzo 30 Pro Using Magisk
Required Files Download Links:
Pre-Requirements
- Fully charge your Realme Narzo 30 Pro or at least 75% of battery available
- You will need a PC /laptop to run the ADB command
- Take Complete backup of android
- Use Original USB Cable
- This guide will only work on Realme Narzo 30 Pro, do not try this guide on any other android device
Warning! All the Steps/ methods shown in this website are Not tested for every smartphone.
If anything happens to your smartphone, We are Not Responsible For Any Loss or Damage to your Smartphone. So, try these steps with your Own Risk!
Step 1: Unlock Bootloader on Realme Narzo 30 Pro?
- First, check if there is any latest update available.
To check (Go to Settings → About → Software Update)
- Then downlow and install Realme Unlock Tool on your device (Links are provided in the download section).
- Open the Unlock Tool Apk and Tap on ”Start applying”.
- After that, accept the agreement and tap on “Submit Application” Button.
- Now, your application will be checked by Realme Server. It takes approximately 1 hour, so wait.
- After that, You will see the message “Review Successful ” in the app. Now you can proceed to unlock the bootloader.
- Then Tap on Start the in-depth test from the app.
- This will automatically reboot your phone into Fastboot mode.
Next, Perform the below steps on Your PC/Laptop
- Download and Setup the SDK Platform Tool on your Windows PC/Laptop.
- Then extract the downloaded zip file on your PC.
- Now, open the extracted folder and type “cmd” on address Bar and Hit Enter to open CMD.
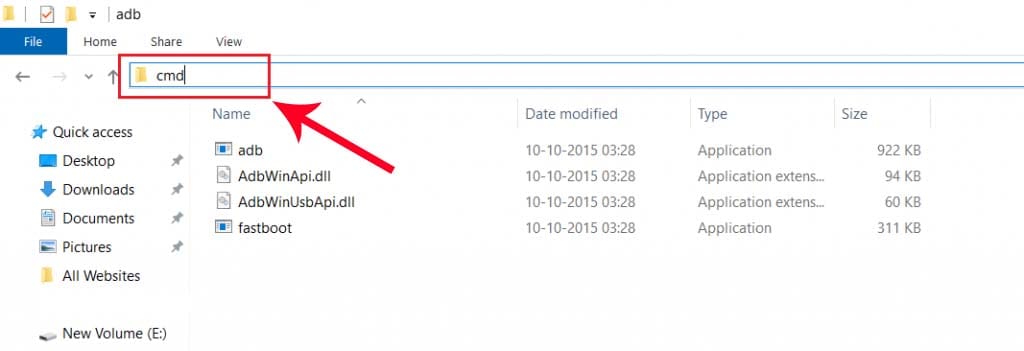
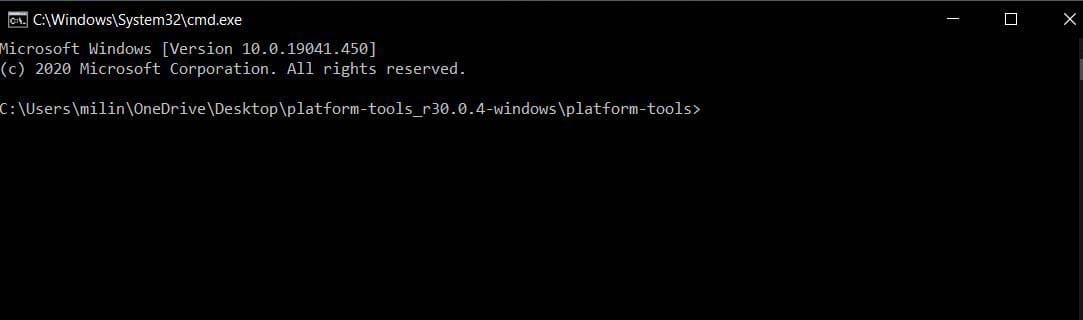
- As soon as you press Enter, a command window will open.
- Connect your Realme Narzo 30 Pro to PC via the USB Cable.
- Next, type the following commands below to reboot into the bootloader mode.
adb reboot bootloader
- Press Enter, type next command.
fastboot flashing unlock
- Press Enter, This command will unlock your Realme Phone Bootloader.
- Now come back to your smartphone and press the volume down key to select “Unlock The Bootloader” and then press power button to confirm.
- That’s it! 🙂 You have successfully unlocked the bootloader on your Realme Narzo 30 Pro.
Must Read: Guide to Unlock Bootloader On Realme Phones With Screenshots
Step 2: Install TWRP Recovery on Realme Narzo 30 Pro
- Download TWRP Recovery file for Realme Narzo 30 Pro on your computer.
- Move the TWRP Recovery .img file to the SDK Platform folder.
- Now Rename the recovery file to twrp.img.
- Then go to your phone and enable developer options.
To do this ( Go to Settings → About Phone → Version information and then tap the Version number 7-8 times)
- Next step, Enable the USB Debugging option in settings.
To do this (Go to Settings → Other settings → Developer Options and enable USB Debugging option)
- Then came back to your computer and open the platform-tools folder.
- Now type “CMD” in the address bar of the platform tool folder and then press Enter.
- Next, boot your phone into fastboot mode.
To do this (Switch off your phone and Press Volume UP button + Power button at the same time, don’t release keys until fastboot mode is opened)
- Then connect your phone to the PC with a original USB cable (Remember, if you see a permission popup on your phone, then allow).
adb reboot bootloader
- The above command will boot your phone in bootloader mode.
fastboot devices
- Press Enter, With the help of this command, you can check your device has connected successfully or not.
fastboot flash recovery twrp.img
- Then type the above command to flash TWRP recovery on Realme Narzo 30 Pro.
Step 3: Root Realme Narzo 30 Pro Using Magisk
Magisk root method is a very advanced and safest method. And the best part of this method is that you will receive the OTA update, and you will be able to use banking apps without any problems.
- First of all, download the latest Magisk App (Magisk Zip) file on your phone.
- Then rename the downloaded Magisk apk file extension .apk to .zip.
- Then Move the Magisk zip file to your phone’s internal storage.
- Make sure you have a Custom Recovery installed on your phone.
- Now Boot your Realme Narzo 30 Pro to Recovery Mode by pressing Volume Down + Power Button at the same time until you see the Boot Animation.
- Then Tap on Install from the TWRP Recovery page.
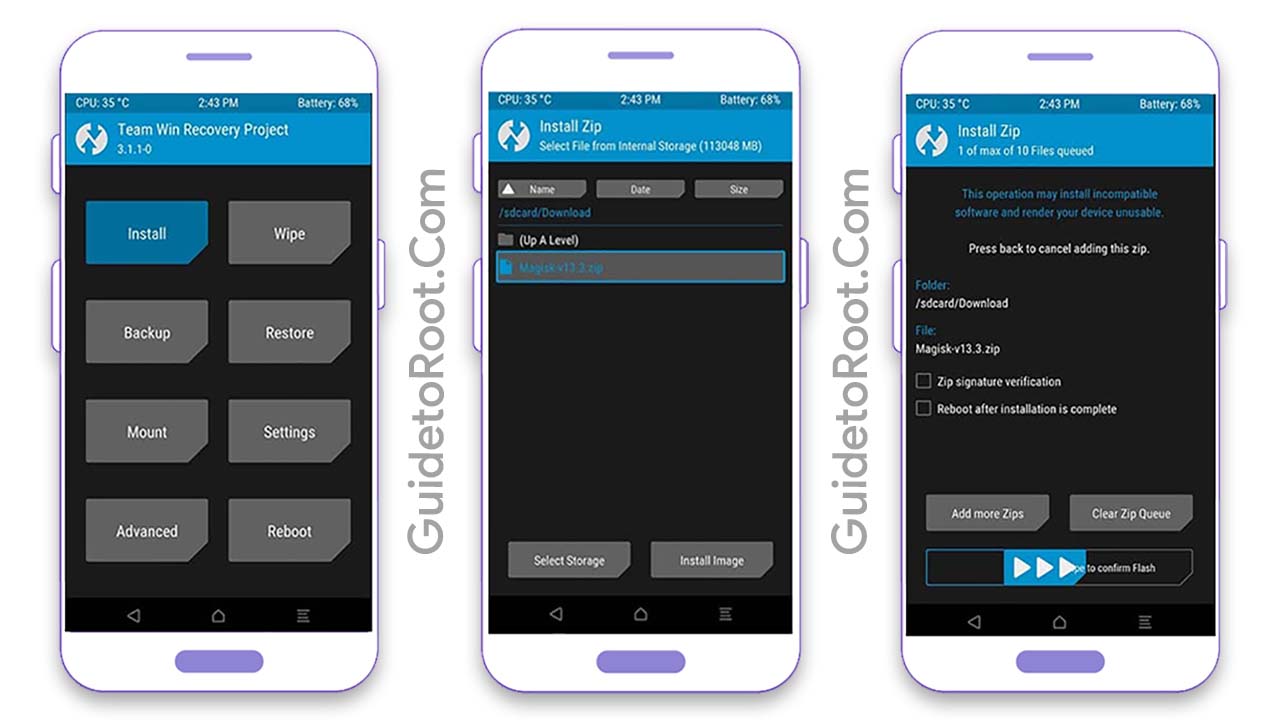
- Now locate Magisk.Zip file from your internal storage and select it.
- After Tap on Swipe To Confirm Flash.
- Then Reboot your phone.
- Once your phone boots up, install Magisk Manager APK.
- You have Successfully Rooted you Realme Narzo 30 Pro device.
How to check if Realme Narzo 30 Pro has been successfully rooted?
If you want to verify the status of the root on Realme Narzo 30 Pro then follow the steps shown below.
- First of all download Root Checker App from Google Play Store.
- Then Open the App → Click “Verify Root”.
- Now, here you will see the message “Congratulations! Root Access is properly installed on this device” if your device has been successfully rooted.
Conclusion:
So, I have shown you the complete Step-by-Step guide on how to Root Realme Narzo 30 Pro smartphone. I hope you find this article useful and informative.
Which method do you want to try first with this guide?
If you have any doubts or questions related to this guide, do let me know in the comment section below, and I will try to resolve your issue as soon as possible.
Thank 🙂 you for reading this article until the end and don’t forget to share this article with your friends.
![Download Magisk App 28.0 and Magisk Zip 28.0 [LATEST 2025]](https://www.guidetoroot.com/wp-content/uploads/2020/12/Download-Magisk-Manager-and-Magisk-Zip-Latest-Version-250x150.jpg)